
Sam Hallas' Website
This is intended to be a description of how we can create subtitles for an original video. Then we'll see how to embed then permanently in the video file. This also applies to other subtitle files downloaded from the internet..
The large menu images can be clicked to give a larger display. Press Esc or click the 'X' close icon to return.
Subtitle Edit is a free (open source) editor for video subtitles - a subtitle editor.
You can read all about it here. Subtitle Edit Home page
And download the latest version from Github Subtitle Edit Download page.
Once you've download and installed Subtitle Edit we can try it out by creating subtitles for a demonstration file
For that purpose I've created this short video to provide a subject. Right-click in the image area to save the file so you can go through the process with me. The file is called original.mp4. Save it in a convenient work folder.
The original file to be worked on
[right click to download it]
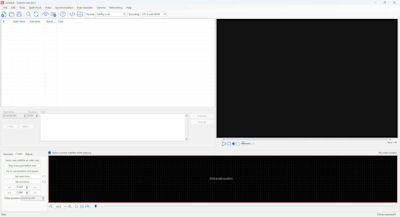
Let's start by opening the program. Here's the opening screen
The blank area top left is where the subtitles will appear along with the start and end times and duration.
The upper large black area is where the video picture will appear.
The lower long black area is where the audio waveform will appear.
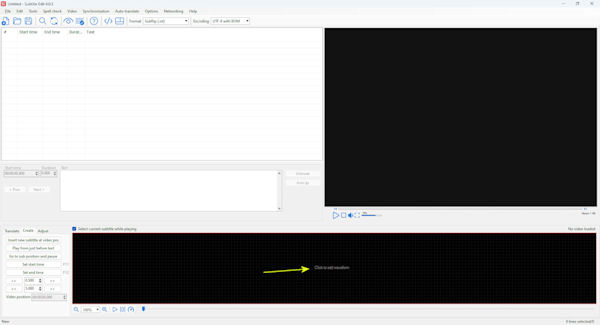
Click on the text "Click to add waveform
A file explorer window will open.
Navigate to our video file, original.mp4, and select it.
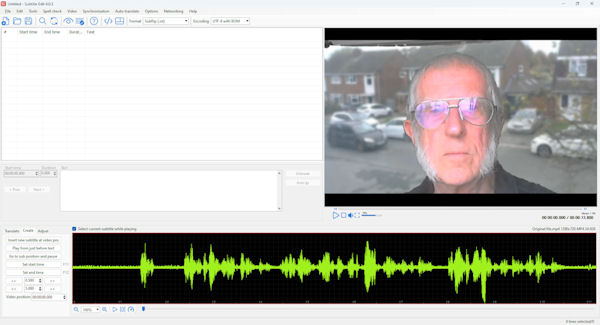
You can now see the opening image in the video,
and the audio waveform it contains.
The next move is to use the speech to text converter.
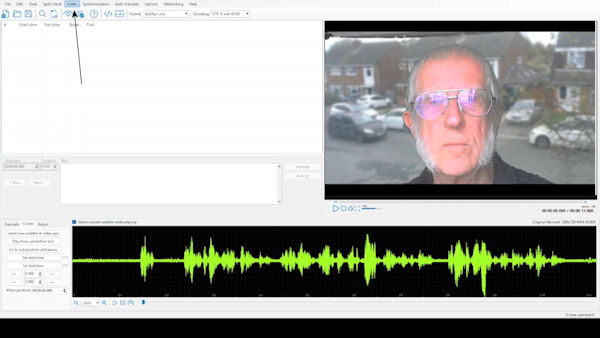
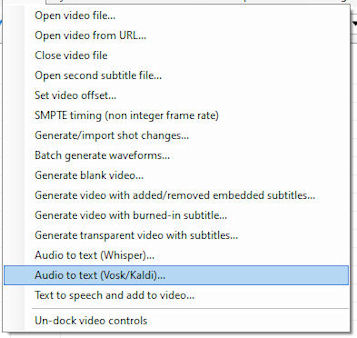
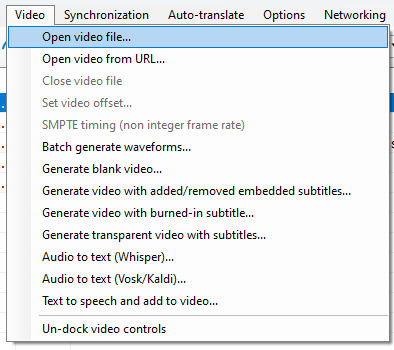
Click on the Video menu entry.
A drop down box will open.
The audio to text items are at the bottom. Both Whisper and Vosk/Kaldi work reasonably well, but Whisper seems more accurate, if slower. Here we're choosing Vosk.
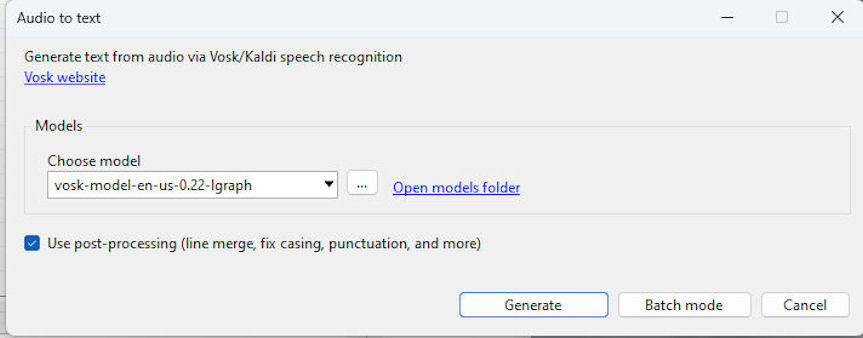
The Vosk options appear.
The default setting seem to work OK
So click the 'Generate' box at the bottom
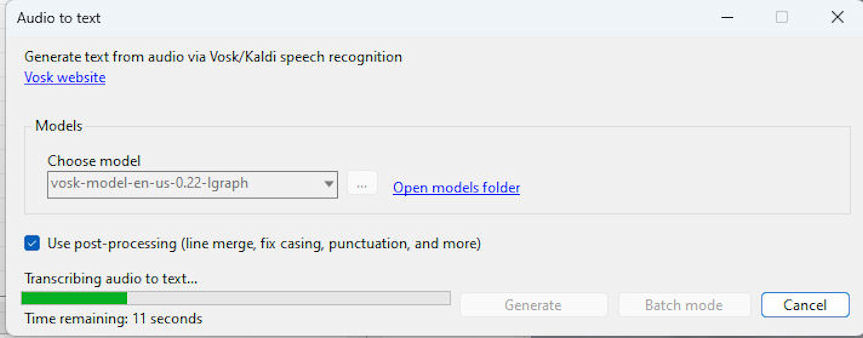
A progress bar is displayed.
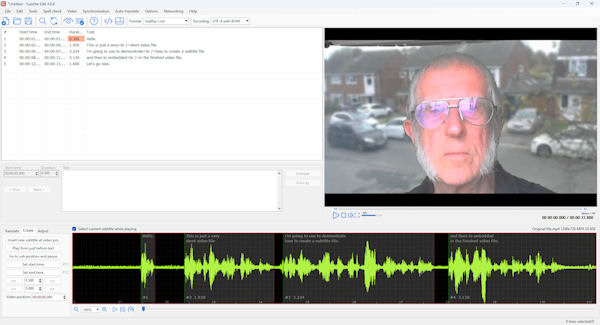
The created subtitles now appear top left showing the formatting.
The waveform box now shows the subtitle text above the waveform and the sequence number and length in seconds below the waveform.
Clicking on the text at the top causes the section of waveform to be highlighted.
Corrections can be made to the text top left by typing. We might Correct subtitle No 3 beginning from "i'm" to "I'm"
When you're satisfied use the File menu to choose 'Save'. The file will have the extension .srt It is a plain text file so you can examine it in a normal text editor program.
It is conventional to name the file the same as the video file. This ensures that any video player can associate the subtitle file with the video file. The video file was called original.mp4, so make the subtitle file original.srt
Try it out by using a video player to play the file original.mp4. Make sure any option to show subtitles is turned on and confirm that they are displayed.
There's no need to close SubtitleEdit just yet if you're going to move onto embedding the text.
In order to embed the subtitles into the video file we can continue where we left off above.
Alternatively, the process can equally be done with files downloaded from the internet of from elsewhere. Apart from the SubtitleEdit program two files are needed - the video file with an .MP4 extension and the subtitle file with a .srt extension. With Subtitle Edit open use the menu option 'File-Open' (Ctrl-O) to locate and open the .srt file. If the video file does not have the same name as the subititle file then you need to use the 'Video-Open video file' menu option to add it. The view should then be the same as the last one in the previous section.
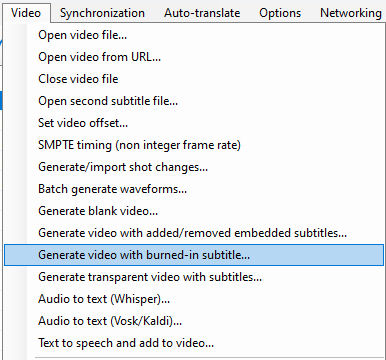
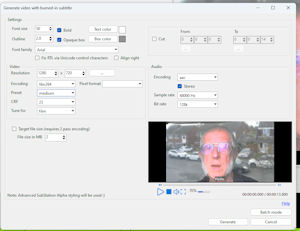
Next click on the 'Video_Generate video with burned-in subtitles' menu item and the Generate video menu will appear. (Click for larger version)
The video window shows how the finished version will appear. The first item to check is the font size. The 50 point size shown here is about right for the video resolution of the sample file. Try changing it to see how it suits your file.
The next items to check are the text colour and the box colour, The text appears in the colour shown inside a box of the other colour. White on grey is the setting here. Change them to suit your preferences. I find that white or yellow give good clarity. The outline value controls the black outline to the text. The 2 point size shown seems about right here and improves the contrast against the grey background. The background colour can be adjusted for both colour and density. Click on 'Box Colour'. For grey the colour is set to white and the shade slider dragged down to dark grey. The density is controlled by the Alpha channel setting. Zero is transparent and 255 is solid. A value of 150 allows some of the underlying image to show through whilst leaving the text readable.
The resolution values shown will be the same as your input file. Changing them will result in file with different resolution and size and may increase the processing time.
The other settings are best left alone unless you understand how they work.
Finally, click the 'Generate' button. The 'Save as' box that opens offers you a default file name of your original name with an appendage of the resolution in pixels and the codec. In this case it's 'original_1280x720_x264.mp4'. Change it if you like to something more meaningful such as original_with_subtitles.mp4.
Here's the finished file. I've had to remove to control bar so you can see the subtitles. To play it, right-click and choose 'Play'.
The finished file with embedded subtitles.
[right click to play or download it]